Making bias tape
Making bias tape from a fabric scrap is easy.
1.
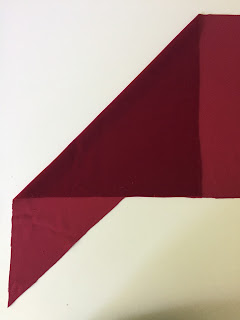
First, make a square by starting with a squared off corner of your fabric (figure 1) and then folding it down at a 45 degree angle (figure 2).
 |
| figure 1 |
 |
| figure 2 |
2.
Cut along the edges, then unfold into a square, and cut the square on the diagonal:
 |
| figure 3 |
 |
| figure 4 |
 |
| figure 5 |
3.
Now turn the top triangle right side up (as if turning a page bound on Left edge, holding onto upper R corner). Place lower triangle on top of it (without rotating), and sew (right sides together) along vertical edge:
 |
| figure 6 |
4.
Open out seam and press open. Then use a ruler to mark strips your desired width PARALLEL TO THE LONGER SIDE. Here I'm marking 3-1/2" wide, but usually you will want 2.5" width:
 |
| figure 7 |
5.
Now comes the slightly tricky part. Fold the fabric right sides together to sew a seam along the shorter sides, but shift the lines one row up, making sure the marked lines cross on the seam you will sew.
Pin and sew this awkward seam, then press seam open:
 |
| figure 8 |
6.
Now cut along the lines you marked, and if you did it right, you should have one continuous strip of bias fabric:
 |
| figure 9 |
From one 11" square I made about 26" of bias tape (not counting the tapered ends).


Comments
Post a Comment